
Have you ever wondered how your travel habits impact the environment—and your hiking performance? Combining eco-friendly choices with smart preparation can make a world of difference. Whether you’re planning a multi-day hike or a weekend adventure, sustainable hygiene and physical readiness go hand in hand.
Creating your own travel toiletries not only reduces waste but also ensures you pack lightweight, efficient essentials. Imagine carrying toothpaste, shampoo, and deodorant made from natural ingredients like baking soda and coconut oil. These DIY solutions save space, cut down on single-use plastics, and keep you feeling fresh on the trail.
But it’s not just about what you pack. Preparing your body for the demands of the outdoors is equally important. Simple exercise routines can boost your stamina and make your journey more enjoyable. By blending eco-conscious choices with smart training, you’re setting yourself up for success.
Ready to take the first step? Let’s explore how DIY toiletries and thoughtful preparation can transform your next adventure into a sustainable, rewarding experience.
Key Takeaways
- DIY toiletries reduce waste and save space in your pack.
- Natural ingredients like baking soda and coconut oil are eco-friendly and effective.
- Lightweight, sustainable products are ideal for multi-day hikes.
- Physical preparation enhances your hiking performance and enjoyment.
- Eco-conscious choices benefit both the environment and your health.
Why Eco-Friendly Toiletries Matter for Your Trek
Ever thought about how your travel toiletries affect the trails you love? Traditional products often leave a lasting mark on the environment. From microplastics to single-use plastics, the impact is significant. Switching to eco-friendly alternatives can make a big difference.

The Environmental Impact of Traditional Travel Toiletries
Conventional toiletries contribute to trail pollution in ways you might not expect. Microplastics from shampoos and soaps can harm aquatic life. Single-use plastics, like toothpaste tubes, take over 450 years to decompose. This waste often ends up in natural spaces, damaging ecosystems.
“Every year, millions of plastic toothbrushes are discarded, adding to the growing problem of environmental waste.”
Even sunscreen can be harmful. Chemicals in traditional sunscreen damage coral reefs. By choosing biodegradable products, you help protect these delicate ecosystems.

Benefits of DIY Alternatives for Hikes
DIY toiletries are not just eco-friendly—they’re practical. Solid shampoo bars and natural deodorants save space and reduce pack weight. For example, 1 oz of liquid toiletries can add 3.5 oz to your backpack when packaged. Switching to solid alternatives lightens your load.
Reducing pack weight improves your hiking endurance. Your legs and muscles will thank you on challenging terrain. Plus, homemade products are often biodegradable, leaving no trace on the trails.

| Product | Traditional Weight | DIY Weight | Savings |
|---|---|---|---|
| Shampoo | 3.5 oz | 1 oz | 2.5 oz |
| Deodorant | 2 oz | 0.5 oz | 1.5 oz |
| Toothpaste | 2.5 oz | 1 oz | 1.5 oz |
By making small changes, you can protect the trails and enhance your hiking experience. Eco-friendly toiletries are a win for both you and the environment.
Essential DIY Travel Toiletries for Sustainable Adventures
Are you ready to upgrade your travel essentials with eco-friendly DIY solutions? Crafting your own toiletries not only reduces waste but also ensures you’re prepared for any adventure. From solid shampoo bars to multi-purpose balms, these homemade products are lightweight, effective, and kind to the planet.

Homemade Solid Shampoo and Conditioner Bars
Solid shampoo bars are a game-changer for travelers. They last up to 60-80 washes, compared to just 25 for liquid shampoos. Made with natural ingredients like coconut oil and shea butter, they’re gentle on your hair and the environment.
Cold-process soap making is simple and rewarding. Combine oils, lye, and essential oils for a customized bar. These bars save space in your pack and reduce plastic waste, making them perfect for days on the trail.

Natural Deodorant for Trail-Ready Freshness
Stay fresh with DIY deodorant made from baking soda and coconut oil. These natural ingredients are moisture-wicking and free from harmful chemicals. A small jar lasts for weeks, keeping you confident on your journey.

Store-bought deodorants often contain aluminum and synthetic fragrances. Homemade versions are biodegradable and safe for sensitive skin. Plus, they’re lightweight, so your back won’t feel the extra weight.
Multi-Purpose Balms for Skin and Lip Protection
Beeswax-based balms are a must-have for outdoor enthusiasts. They protect against windburn, soothe blisters, and even act as lip balm. Pack one jar for multiple uses, saving space and time.

DIY balms are easy to make with beeswax, coconut oil, and essential oils. They’re perfect for protecting your feet during long hikes or your hips from chafing. Plus, they’re biodegradable, leaving no trace on the trails.
| Product | Traditional Weight | DIY Weight | Savings |
|---|---|---|---|
| Shampoo | 3.5 oz | 1 oz | 2.5 oz |
| Deodorant | 2 oz | 0.5 oz | 1.5 oz |
| Balms | 1.5 oz | 0.5 oz | 1 oz |
By switching to DIY toiletries, you’ll lighten your load and protect the environment. These eco-friendly solutions are practical, sustainable, and perfect for your next adventure.
Packing Light: Minimizing Weight Without Sacrificing Hygiene
What if you could cut your pack weight without compromising on hygiene? Strategic packing is the key to balancing essentials and comfort. By choosing lightweight materials and organizing your gear smartly, you can reduce strain on your body and enjoy your adventure more.

Start by swapping heavy containers for lighter alternatives. Silicone bottles weigh less than plastic and are more durable. For example, a 2 oz silicone bottle saves 0.5 oz compared to its plastic counterpart. These small changes add up, especially on longer miles.
Compression sacks are another game-changer. They shrink bulky items like sleeping bags, freeing up space in your backpack. This not only reduces weight but also keeps your gear organized and accessible.
| Item | Plastic Weight | Silicone Weight | Savings |
|---|---|---|---|
| Shampoo Bottle | 2.5 oz | 2 oz | 0.5 oz |
| Toothpaste Tube | 1.5 oz | 1 oz | 0.5 oz |
| Soap Container | 1 oz | 0.5 oz | 0.5 oz |
Multi-use items are your best friend. Trekking poles can double as tent supports, and a single balm can protect your legs, lips, and hands. This approach saves space and reduces the number of items you need to carry.
Finally, focus on core essentials. Dehydrated meals and collapsible water bottles cut down on food and water weight. By planning ahead, you can ensure your pack is light but complete.
With these tips, you’ll not only lighten your load but also boost your endurance and strength on the trail. Packing smart is the first step toward a more enjoyable adventure.
Long Distance Trek Training Tips for Beginners
Preparing for a challenging adventure requires more than just packing the right gear. Building your endurance and strength is essential for tackling the demands of the trail. Whether you’re a beginner or looking to improve, a structured approach can make all the difference.

Building Endurance with Gradual Mileage Increases
Start by increasing your weekly miles gradually. The 10% rule is a great guideline—add no more than 10% to your total distance each week. This helps prevent injuries and allows your body to adapt. For example, if you walk 10 miles this week, aim for 11 miles next week.
Incorporate back-to-back walks to simulate the demands of multi-day adventures. This builds stamina and prepares your legs for sustained effort. Use apps like AllTrails to find local routes that match your terrain goals.
Incorporating Hills and Uneven Terrain
Hills and uneven surfaces are a reality of most hikes. Training on similar terrain prepares your legs and improves your balance. Start with gentle slopes and gradually increase the incline. Use treadmills or stairs if hills aren’t accessible.
Focus on your core strength to maintain stability on uneven ground. Exercises like step-ups and lunges are excellent for building the muscles needed for challenging trails. Trekking poles can also provide extra support on steep climbs.
| Week | Total Miles | Terrain Focus |
|---|---|---|
| 1-4 | 10-15 | Flat trails |
| 5-8 | 16-25 | Rolling hills |
| 9-12 | 26-35 | Steep inclines |
By following a 12-week progressive schedule, you’ll build the endurance and strength needed for your adventure. Remember, consistency is key. Stick to your plan, and you’ll be ready to conquer the trail with confidence.
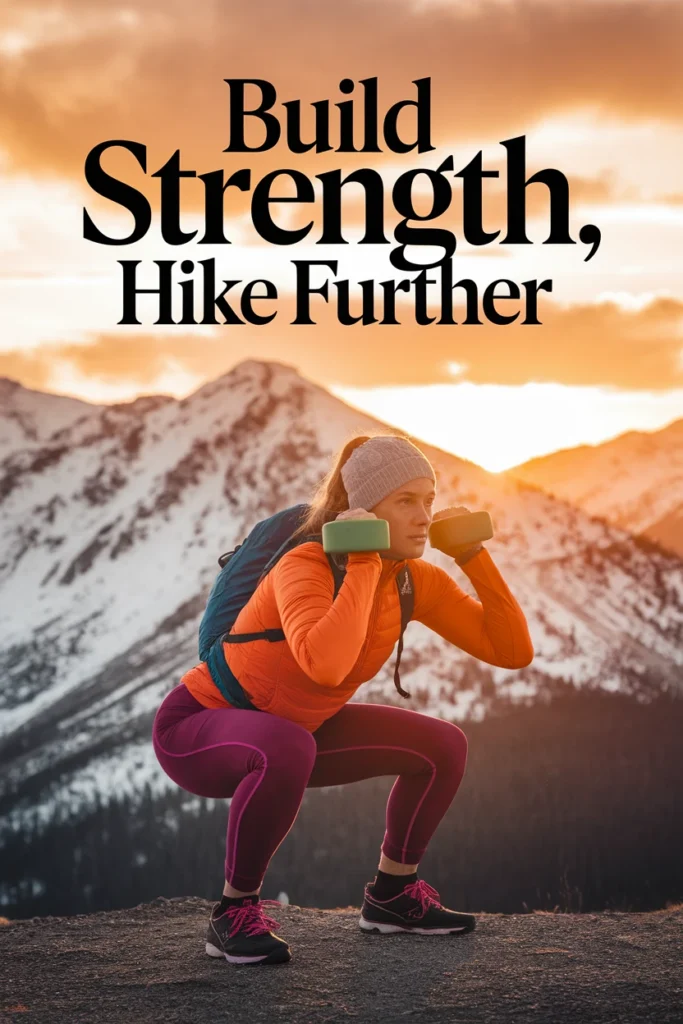
Strength Training Exercises for Hikers
Building strength is key to enjoying your outdoor adventures to the fullest. Strong muscles help you carry your pack with ease and tackle uneven terrain confidently. Whether you’re climbing hills or navigating rocky paths, targeted exercises can make a big difference.
Leg and Core Workouts for Stability
Your legs and core are the foundation of every step you take. Start with weighted step-ups to build strength in your quads and glutes. Begin with 20 steps on each leg and increase by 5-10% each week. Add a backpack with light weight to simulate trail conditions.
Plank variations are excellent for core stability. Start with a 30-second plank and progress to 1 minute. Add side twists to engage your obliques and improve balance. These exercises prepare your muscles for the demands of the trail.
Upper Body Strength for Backpack Support
Carrying a pack requires strong shoulders, arms, and back muscles. Try backpack deadlifts to build endurance. Use a backpack filled with light cans or books. Perform 10-15 lifts, gradually increasing the weight as you gain strength.
Resistance band workouts are another great option. They’re lightweight and versatile, making them perfect for travel. Focus on rows and shoulder presses to target key muscles used while hiking.
| Exercise | Reps/Sets | Progression |
|---|---|---|
| Weighted Step-Ups | 20 steps per leg | Add 5-10% weekly |
| Plank Variations | 30 seconds to 1 minute | Add side twists |
| Backpack Deadlifts | 10-15 lifts | Increase weight gradually |
By incorporating these exercises into your routine, you’ll build the strength needed for any adventure. Strong legs, a stable core, and a powerful upper body will make your hikes more enjoyable and less tiring.
Pre-Trek Conditioning: Balance and Flexibility
How often do you think about improving your balance and flexibility for outdoor adventures? These two elements are essential for navigating uneven terrain and keeping your body injury-free. Whether you’re planning a weekend hike or a multi-day adventure, conditioning your muscles and joints can make a world of difference.
Incorporating yoga and stretching routines into your daily life can enhance your flexibility and stability. These practices not only prepare your legs and core for the demands of the trail but also improve your overall performance. Let’s explore some effective ways to build balance and flexibility before your next adventure.
Yoga Poses for Hikers
Yoga is a fantastic way to improve your balance and flexibility. Poses like Downward-Facing Dog and Warrior II stretch your muscles while strengthening your core. These poses are particularly helpful for decompressing your spine after carrying a backpack.
For a more dynamic flow, try Sun Salutations. This sequence warms up your body and increases blood flow to your muscles. It’s perfect for preparing your legs and feet for the challenges of the trail.
“Yoga not only enhances physical strength but also promotes mental clarity, making it an ideal practice for hikers.”
Daily Stretching Routines
Stretching is key to maintaining flexibility and preventing injuries. Focus on dynamic stretches before your hike to warm up your muscles. Leg swings and lunges are excellent for improving mobility.
After your hike, switch to static stretches to cool down. Hold each stretch for 30 seconds to allow your muscles to relax. This routine supports recovery and prepares your body for the next adventure.
| Stretch Type | Benefit | Duration |
|---|---|---|
| Dynamic | Warms up muscles | 5-10 minutes |
| Static | Improves flexibility | 30 seconds per stretch |
For more detailed conditioning tips, check out this comprehensive guide on pre-hike preparation.
By incorporating these practices into your routine, you’ll build the balance and flexibility needed for any adventure. Your body will thank you on the trail!
Gear Testing and Preparation Before Your Hike
Ready to ensure your gear is trail-ready before your next adventure? Proper preparation can make the difference between a smooth journey and a frustrating one. Testing your equipment helps you identify issues early and ensures everything works as expected. From breaking in your boots to testing your backpack, these steps are essential for a successful hike.
Breaking in Boots and Testing Backpacks
Breaking in your boots is essential for comfort on the trail. Start with short walks around your neighborhood, then progress to day hikes with a loaded backpack. Salomon Quest 4D boots are a great choice for their durability and support. Wear them for at least a week to ensure they fit well and prevent blisters.
Your backpack should also be tested before your hike. A 40-50L capacity is ideal for most adventures. Gradually increase the weight and distance to ensure it’s comfortable and functional. Adjust the straps to distribute the weight evenly across your body.
- Use blister prevention socks to keep your feet comfortable.
- Test waterproofing by exposing your gear to wet conditions.
- Carry repair items like duct tape for unexpected gear failures.
Practice Hikes with Full Gear
Practice hikes are the best way to simulate real trail conditions. Start with shorter miles and gradually increase the distance. Carry all your gear, including trekking poles, to ensure familiarity and reliability. Test your equipment over several days to identify any issues.
Listen to your body during these hikes. Adjust your pack weight for optimal comfort and ensure your sleeping bag and tent are easy to set up. A gear shakedown checklist can help you eliminate unnecessary items and reduce pack weight.
| Phase | Focus | Duration |
|---|---|---|
| 1 | Short walks with boots | 1 week |
| 2 | Day hikes with backpack | 2 weeks |
| 3 | Multi-day practice hikes | 1 week |
By following this 3-phase gear testing timeline, you’ll be fully prepared for your adventure. Proper preparation ensures your gear is reliable, your body is ready, and your hike is enjoyable.
Conclusion
Ready to transform your next adventure into a sustainable and rewarding experience? By combining eco-friendly practices with smart preparation, you can make a lasting impact on the trails and your body. Lightweight DIY toiletries and gradual training routines ensure you’re ready for the journey ahead.
Start small and build your endurance over time. Whether it’s swapping single-use plastics for homemade solutions or incorporating strength-building exercises, every step counts. Remember, the way you prepare today shapes the success of your trip tomorrow.
As you embark on your next hike, keep this mantra in mind: “Every step is a chance to grow stronger and leave the world better than you found it.” For a detailed guide, download our free training checklist and explore trusted gear like Osprey backpacks and Salomon boots to elevate your experience.